Wednesday, May 23, 2012

Smokin' - The first Blower Door Test

A couple of weeks ago we had our first blower door test.  A blower door test tests air leakage in a building.  This test, the first of several we expect, was meant to see how tight the frame of the house is.
The builder next to the blower door
 
Since the windows and doors haven’t been installed, window and door openings were all sealed, either with house siding (i.e. they haven’t been cut out yet) or taped shut with plastic.  A special blower was placed in the front door.  First, the blower pulled air out from the house, depressurizing it to 50 pascals.  Air pressure inside the house was less than air pressure outside causing air outside to be sucked into the house.  A meter then measured how much air entered the building.
 
The passive house standard requires that air leakage in a building be limited to 0.6 ACH  (air change per hour) at 50 pascals.  This means that when the house is pressurized to 50 pascals pressure differential between inside and outside, 0.6 of the volume in the house will leak in or out each hour.  For a house the size of ours we were looking for a reading of 350 (not sure what units) from the meter to meet the Passive House standard.  The meter reading was 220 or less than 2/3 of the Passive House threshold.
 
For comparison, our builder told us he performed the blower door test on his own home, a typical leaky home, and got a meter reading of 4000.  At another client’s home where they took a leaky home and did some energy efficiency work, the meter reading after the energy efficiency work was 1900.  This illustrates that it’s much easier to build a house that’s air tight than it is to take a leaky house and make it air tight.
 
Air leakage is measured when a building is pressurized because it’s much more difficult to measure under normal conditions.  The pressurized readings can then be mathematically converted to normal condition readings (by dividing by 16 or 17).  The Passive House standard of 0.6 ACH at 50 pascals converts to about 0.035 ACH without a pressure differential.  This means that under normal conditions only 3.5% of the air volume in a house will leak out per hour.  Compare this to our builder’s leaky home where more than 50% of the volume of air will leak every hour.  Much of the energy that a building loses is through air leakage.  We can see here that our house will lose a small fraction of the energy that a typical leaky house loses.  This is a clear example of how putting a little thought and energy into the early stages of construction can make a home much more energy efficient without a big expense. 
 
 
Fogging the seams inside the building
 
After the air leakage readings were taken, the builder broke out a fog machine.  This time, the blower door fan was reversed to pull air into the building and create higher pressure inside.  Fog was blown against all the seams inside the building while the framing crew looked for escaping fog outside the building.  The few areas where leakage was found were marked and sealed with silicon or tape.

Here's a quick video showing the fogging from outside the building:


The next blower door test will probably take place after the windows and doors have been installed.


Saturday, April 28, 2012

What is a Passive House?


Here’s another crack at a very brief summary of what a Passive House is.  There’s a ton of information on this subject available on the internet.  At the end of the post are links to a bunch of sites that are very informative if you’re interested in reading further.


What is a Passive House?

A Passive House (PH) is an ultra-energy efficient building.  The PH standard was developed in Germany in the 1980s and 1990s.  A building built to the PH standard will require a small fraction of the energy to heat and cool compared to a building constructed in a more standard manner.  A common boast about a PH is that it only requires a couple of hair dryers for heating in the dead of winter in a cold climate.  By capturing heat from the sun and effectively keeping that heat inside the building, a PH is able to accomplish this seemingly magical feat.  The PH standard is one of the most rigorous building standards in the world.

The PH standard requires that a building’s energy usage not exceed very strict limits.  Additionally, there is one prescriptive requirement to meet the PH standard, i.e. that there is very little air leakage in the building.  The table below illustrates the PH requirements.

Criteria
Requirement in kBTU/ft2
Requirement in kWh/m2
Annual Heat Demand
≤ 4.75 kBTU/ft2
≤ 15 kWh/m2
Peak Heat Load
≤ 3.17 kBTU/(ft2hr)
≤ 10 kWh/(m2hr)
Annual Cooling Demand
≤ 4.75 kBTU/ft2
≤ 15 kWh/m2
Total Annual Source (Primary) Energy
≤ 38.1 kBTU/ft2
≤ 120 kWh/m2
Air Leakage
≤ 0.6 ACH @ 50 Pascals


Here’s an example of a comparison of a Passive House to a traditional house.  The current 2100 ft2 condo we live in, built in the 1970s, is heated by 525 gallons of kerosene per year.  At 135,000 BTU/gallon of kerosene, this equates to an annual heat demand of 71,000 kBTU.  To meet the PH standard, a 2100 ft2 condo would need to have an annual heat demand of no greater than 10,000 kBTU (4.75 times 2100).  A PH the same size as our current home would need to consume at most 14% of the energy we currently use to heat our home.  For our condo to meet the PH standard, we’d need to be able to heat our home with 74 gallons of kerosene instead of 525 gallons.

Preliminary indications are that our new house with a floor area of 2800 ft2 will have an annual heating demand of 3.6 kBTU/ ft2, exceeding the PH standard by 25%.  A very small 9000 BTU air source heat pump will be able to heat the entire house using only 1250 kWh per year of electricity.  At $0.14/kWh this will cost $175 per year which is considerably cheaper than the $2500 a year we spend to heat our smaller condo.

The analysis above is a bit of a simplification.  The hypothetical 2100 ft2 condo described wouldn’t need to actually use 74 gallons of kerosene to heat, rather, the PH modeling software would need to think that it would use the energy equivalent of 74 gallons of kerosene to heat.  We’re taking the leap of faith that, in our new home, the heating requirements projected by the PH modeling software will be close to the actual heating requirements.  We’ll report back to you on this after the winter.


What techniques are employed in building a Passive House?

The combination of the following 3 strategies can result in a building meeting PH certification requirements.

  1. Passive Solar Building Design
    1. The vast majority of windows face south.
    2. High efficiency windows with very high solar heat gain coefficients are used, i.e. windows that are able to capture heat from the sun inside the house rather than reflect the heat back outside.
    3. Roof overhangs shade windows when the sun is high in the sky during the summer months to prevent overheating.
  2. Air Tightness
    1. No air gets in or out of the building except through a mechanical ventilation system that transfers energy from the indoor air being exhausted to the incoming outdoor air.  Very efficient Energy Recovery Ventilation systems are able to retain up to 90% of the indoor air’s energy.
  3. Super Insulation
    1. Framing with techniques to reduce Thermal Bridging, i.e. energy leaking in and out of the building through studs in the wall
    2. Thick walls that contain very effective insulation
    3. High efficiency windows that reduce heat losses overnight

None of these techniques are very difficult or expensive to implement.  They just require thought in the design process to achieve the goal of energy efficiency.


What are the benefits of living in a Passive House?

  • A planet friendly lower carbon footprint.
  • Reduced costs for building heating and cooling.
  • More comfortable indoor environment.
    • The entire house stays one temperature.  No cold or hot rooms.
    • There are no drafts. 
    • Wall and window temperatures remain very close to room temperature.
  • Healthier indoor environment.
    • The mechanical ventilation system ensures that fresh air is constantly circulating through the building. 
    • Ventilation system filters reduce the amount of particles in the indoor air. 
    • Moisture levels are carefully controlled to eliminate the risk of mold.


Places to read more about Passive Houses?

There are tons of sites with information about PH.  Below are some sites that I’ve found useful.


Monday, April 23, 2012

Raise the Roof

Fork lift setting a section of the trusses
Looking up through the trusses to the sky
Our big green box is looking more like a house now that the roof is on.  I watched as the builders attached with uniform spacers several custom built trusses. This created as section of the roof that was then fork lifted onto the top of our big green box.  This process was repeated a few more times which completed the structure that is like a beautiful spine that creates the structure of the roof.  This heavy duty structure will be supporting many PV Solar panels as well as some good New England snow so it has to be strong. 

Today the builders finished putting on the roof sheathing.  You can see the seams are taped to help create a tight air seal necessary for a Passive House.

After the internal room studs are placed, the next few steps will really distinguish the building process as being uniquely Passive House with the installation of the insulation.  To stay tuned, please enter your email address on the right into "follow by email".  You will receive a notice when we post each new blog entry.  I will no longer send out individual email reminders.


It's starting to look like a house


Saturday, April 7, 2012

From the dirt, a house begins to emerge


Foundation poured and backfilled.
Apropos of Spring, Our Connecticut Passive House has sprouted up from the ground like the crocuses and daffodils. After seeing our house for so long on paper and in my imagination, it's amazing to see it physically begin to take shape.

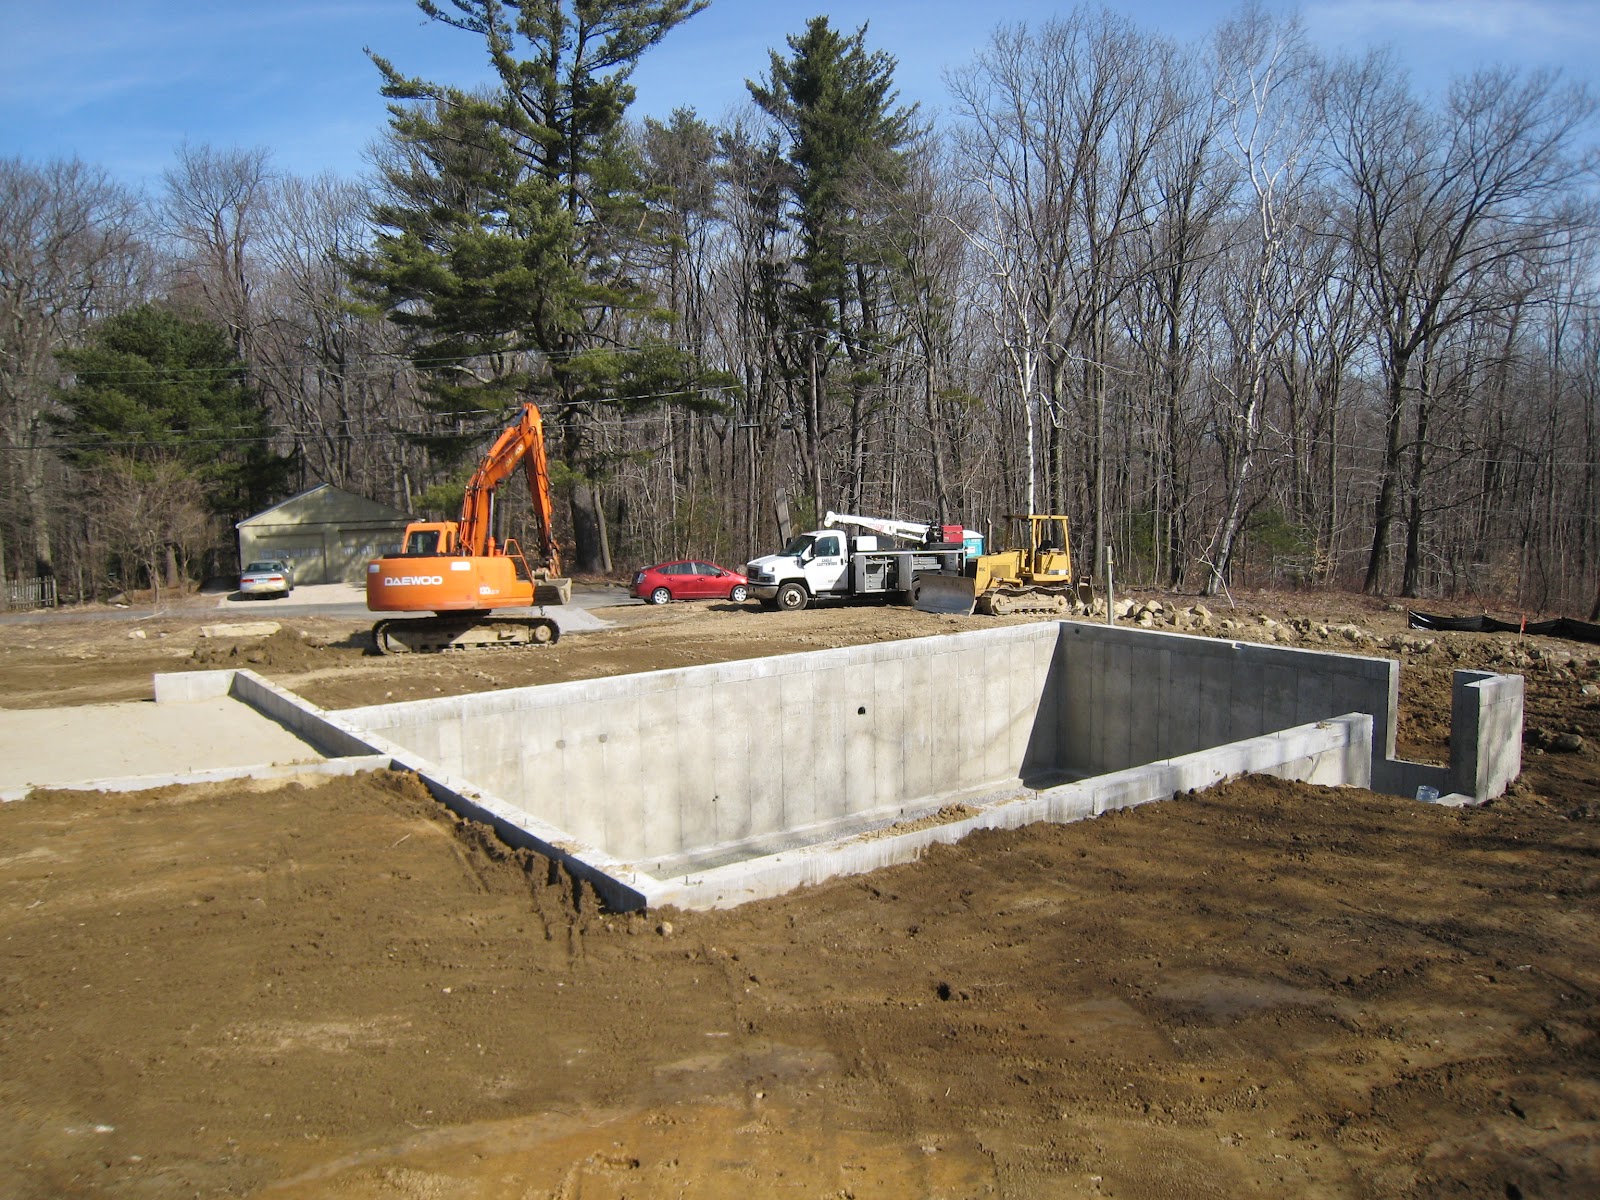
Cement footings, then thick cement walls for the basement and the base of the garage were poured last month, thanks to the mild winter. The first floor/basement ceiling has been constructed as well as part of the first floor exterior walls.
South/east corner.  Large windows let light and heat in
 the lower level.
So far, it looks like construction you'd see on a typical house.  There are a few differences, however.  A lot of attention is being paid to air tightness as the frame is constructed.  Gaps between consecutive sill plates are sealed.  There's a layer of rubber weatherstripping between the foundation and the sill plate.  Joints on the exterior walls are sealed with tape.  A lot of attention is also paid to reducing thermal bridging.  Instead of joists 16" apart ours are 24" apart.  The frame of the house will be constructed with double stud walls.  You can see the exterior stud wall in this picture.  Inside the exterior studs will be 5" of rigid foam insulation creating a continuous area of insulation.  Inside the rigid foam insulation will the be interior stud wall.  Both the interior and exterior stud walls will be insulated with cellulose between the studs. In the basement, a layer of rigid foam insulation will sit inside the foundation walls and underneath the concrete basement floor.

A huge ammount of planning and design has gone into this project and it is so exciting to see it all comming to fruition.  I guess I need to rename "our patch of dirt".  Now it's "our big green box".

Monday, February 20, 2012

Ground Breaking News

Today we officially broke ground at our "patch of dirt".   I have been conspicuously absent from blogging for several months.  There was lots being done behind the scenes.  Re-designs and revisions, contract negotiations, permit applications, choosing of finishes etc.  Lots of decisions to be made and with so much up in the air I didn't want to report until things were a little more settled.  Now we are settled back down on the ground and diggin' it!

A big CAT on the land.
Paul has spent numerous hours researching Solar PV (electricity) and Solar Thermal water heating systems.  He'll blog abut the details of that aspect of the plan. Our secondary goal after achieving Passivehouse standard is to be as close as possible to net zero in our electricity usage. We want to generate enough electricity to cover our anual consumption.  We will still be connected to the grid, drawing electricity in the winter when our capacity to generate power will not meet our needs, and selling back to the grid in the summer when we should generate more than we will consume.  Paul the math guy has been crunching the energy numbers to size the solar array properly.

While that's fun for him, I've been having fun choosing backsplash tile and faucets, light fixtures and door knobs.  Though not so important to the Passivehouse aspect of the project, it's these design details that will make the house our home.

I will try to document each phase of the construction and highlight the Passivehouse elements.  I'll show what makes this house different from standard house construction.  Soon they will be pouring the foundation.  We have been super lucky that the weather has been mild this winter (knock on wood).  The temperatures have been above freezing during the day and there is no snow on the ground.  First the site prep.  It feels good to be back in the blogging business.

Thursday, October 13, 2011

Lifestyle compromises in an ultra-energy efficient home (or welcome to the world of ventless dryers)

Autumn at our patch of dirt
(This blog entry was written by Paul)

A Passive House uses 10% of the heating energy of a traditionally built house.  Once you spend the extra time, effort and money on designing and building a home to the Passive House standard are you done?  Is it business as usual living in a Passive House or do you need to make some compromises?

So far, we’ve been asked to get comfortable with two things that are a little different from our current way of doing things, tilt-turn windows and ventless dryers.

Double or hung or sliding windows don’t cut it in terms of energy efficiency.  They just don’t seal well enough at the seam where the windows on different tracks meet.  In the US, we have casement windows which create a much better seal, but the most energy efficient windows being made are from Europe.  These European windows use a tilt-turn system.


After searching the web to learning about tilt-turn windows, I only had one concern.  Because the windows open by tilting inwards, I was worried about being able to close a blind or shade with the windows open.  Since our house is going to have one foot thick walls, the windows can be installed such that there is a very deep window sill.  This will allow the windows to tilt in without breaking the plane of the inside walls.  Having spent the last several winters up here in northwest CT with less efficient sliding windows, I look forward to having tilt-turn windows that really keep the heat inside the house.

Ventless dryers were a different story.  The problem with a vented dryer is that it pumps quite a bit of air from the room where the dryer is located directly out of the building envelope.  One of the fundamental principals of a Passive House is air tightness.  The only air that enters or exits the envelope should be through the energy recovery ventilation (ERV) system.  Vented dryers are inconsistent with this principal.  (Dear ERV designers, it would be really cool if one could vent their dryer through the ERV system)

So, vented dryers won’t work with a Passive House.  What’s so bad about a ventless dryer? 

Drawbacks:
  • Might be slower than vented dryers:
  • Are smaller than vented dryers (7.3 c.f. vs 4.2 c.f.)
  • Are much more expensive than vented dryers.
  • Are reportedly less energy efficient (excluding venting issues, but this is difficult to confirm since no dryers have an EnergyGuide).
  • Require periodic cleaning of the condenser
  • Air cooled condensers heat up the room they occupy (I think that all the ones I’ve seen on the market are air cooled)
  • Water cooled condensers use additional tap water
  • A bunch of lint that gets through the lint trap to the condenser seems like it will be making it’s way to the septic system.
Benefits:
  • No need for a vent that forces hot air out of your house at > 100cfm which must be replaced with cold air from outside.
  • Air cooled condensers heat up the room they occupy (nice in the winter)
There are not a ton of models available in the US:

Cubic Feet

 4.2                  LG       DLEC855W
3.95                 Bosch  WTE86300US
4ish                  Miele   T8013C
4ish                  Asko    793C

In Europe and Asia, they also have heat pump dryers which are just like condenser dryers but 40% more efficient.  Bosch apparently has a model, the EcoLogixx 7 that uses the condensed water to clean itself reducing maintenance.  But in the US, the vast majority of dryers sold are vented, so we don’t have access to the latest and greatest in ventless dryer technology.

The main issue is that the ventless dryer is going to make doing laundry take twice as long to do.  We’ll need to do two dryer loads for every one that we currently do.  We’ve decided that we can live with this.  We might try to get around this by buying a second dryer for the laundry room.

So, as far as I can tell, apart from issues with the clothes dryer, living in a Passive House shouldn’t require much in the way of lifestyle compromises.

If you’re interested in reading more about ventless dryers in a Passive House check out http://vermontpassive.com/2011/08/dryer-conundrum.

Saturday, September 17, 2011

The lay of the land

Our "patch of dirt" in early spring
First of all, thanks to all my friends and neighbors who have read this blog.  Many of you seem genuinely interested in our process and have asked several great questions about PH.  Mostly in the realm of "How will you stay warm in the winter?"  Without getting into the long answer right now, let me just say you will all be invited over next winter to find out.  All non acquaintances reading this blog, I'll address that question in a future post when the details of the mechanicals have been finalized.

Last week we met with a Site Planner/Landscape Architect from CR3 named Gary Hath.  We have many elements to arrange on the site in addition to the house that need careful planning.  Solar exposure and orientation is very important in PH design. We also have to consider water runoff management and install a septic system.  There's lots to plan such as the lawn/play field, veggie garden, stone patios, septic field, driveway/approach to the house, landscaping and flower gardens, and tennis court (after all, we are the Honigs).  These element are being mapped out so the site can be properly graded and the foundation dug once the house plans are approved.
First version of the site plan


Oh yes, the house plans.  Our architect Jamie Wolf is busily working on the detailed schematics and energy analysis of the house plans to submit for approval to get our building permits.  We have scale drawings of the layout of the house and Jamie has even created a 3D computer model of the interior and exterior.  It's starting to feel like a real place.  Jamie is doing a fantastic job of taking our needs, wants, and vision for our family and shaping them into a physical space that works on many levels: aesthetically, functionally, energy efficiently, etc.

Paul and my homework this week has been to start looking at appliances, cabinetry, flooring, tile, and fixtures. It is early in the process but we need to have all the "fixin's" ready to go in as soon as the structure is built.  For appliances, energy efficiency is paramount.  We are planning on choosing low VOC cabinetry.  I've ordered some samples of bamboo flooring and recycled glass counter tops made out of beer bottles.  The design style we are going for, I describe as Modern Farmhouse/SOHO Loft (you can take the girl out of New York,.....) which to me feels warm with an open layout and some wood elements.  There are also a few surprise architectural elements. I can't wait to throw our first party.